One of my favorite ways to add color and life to a room is by hanging beautiful pieces of art. However, they can get really pricey! Usually I find great pieces at craft fairs, markets or even on e-bay, but sometimes I can’t find exactly what I’m looking for for a good price. So, like I always say – there’s no need to dig deep into your pockets if you can make it yourself, even wall art! I love the spontaneous child-like paintings that are trending these days. They’re not too hard to re-create (you can even get your own kid to help you out!) and it doesn’t matter if you mess up because imperfections are what make this kind of painting interesting. So grab some brushes and get painting!
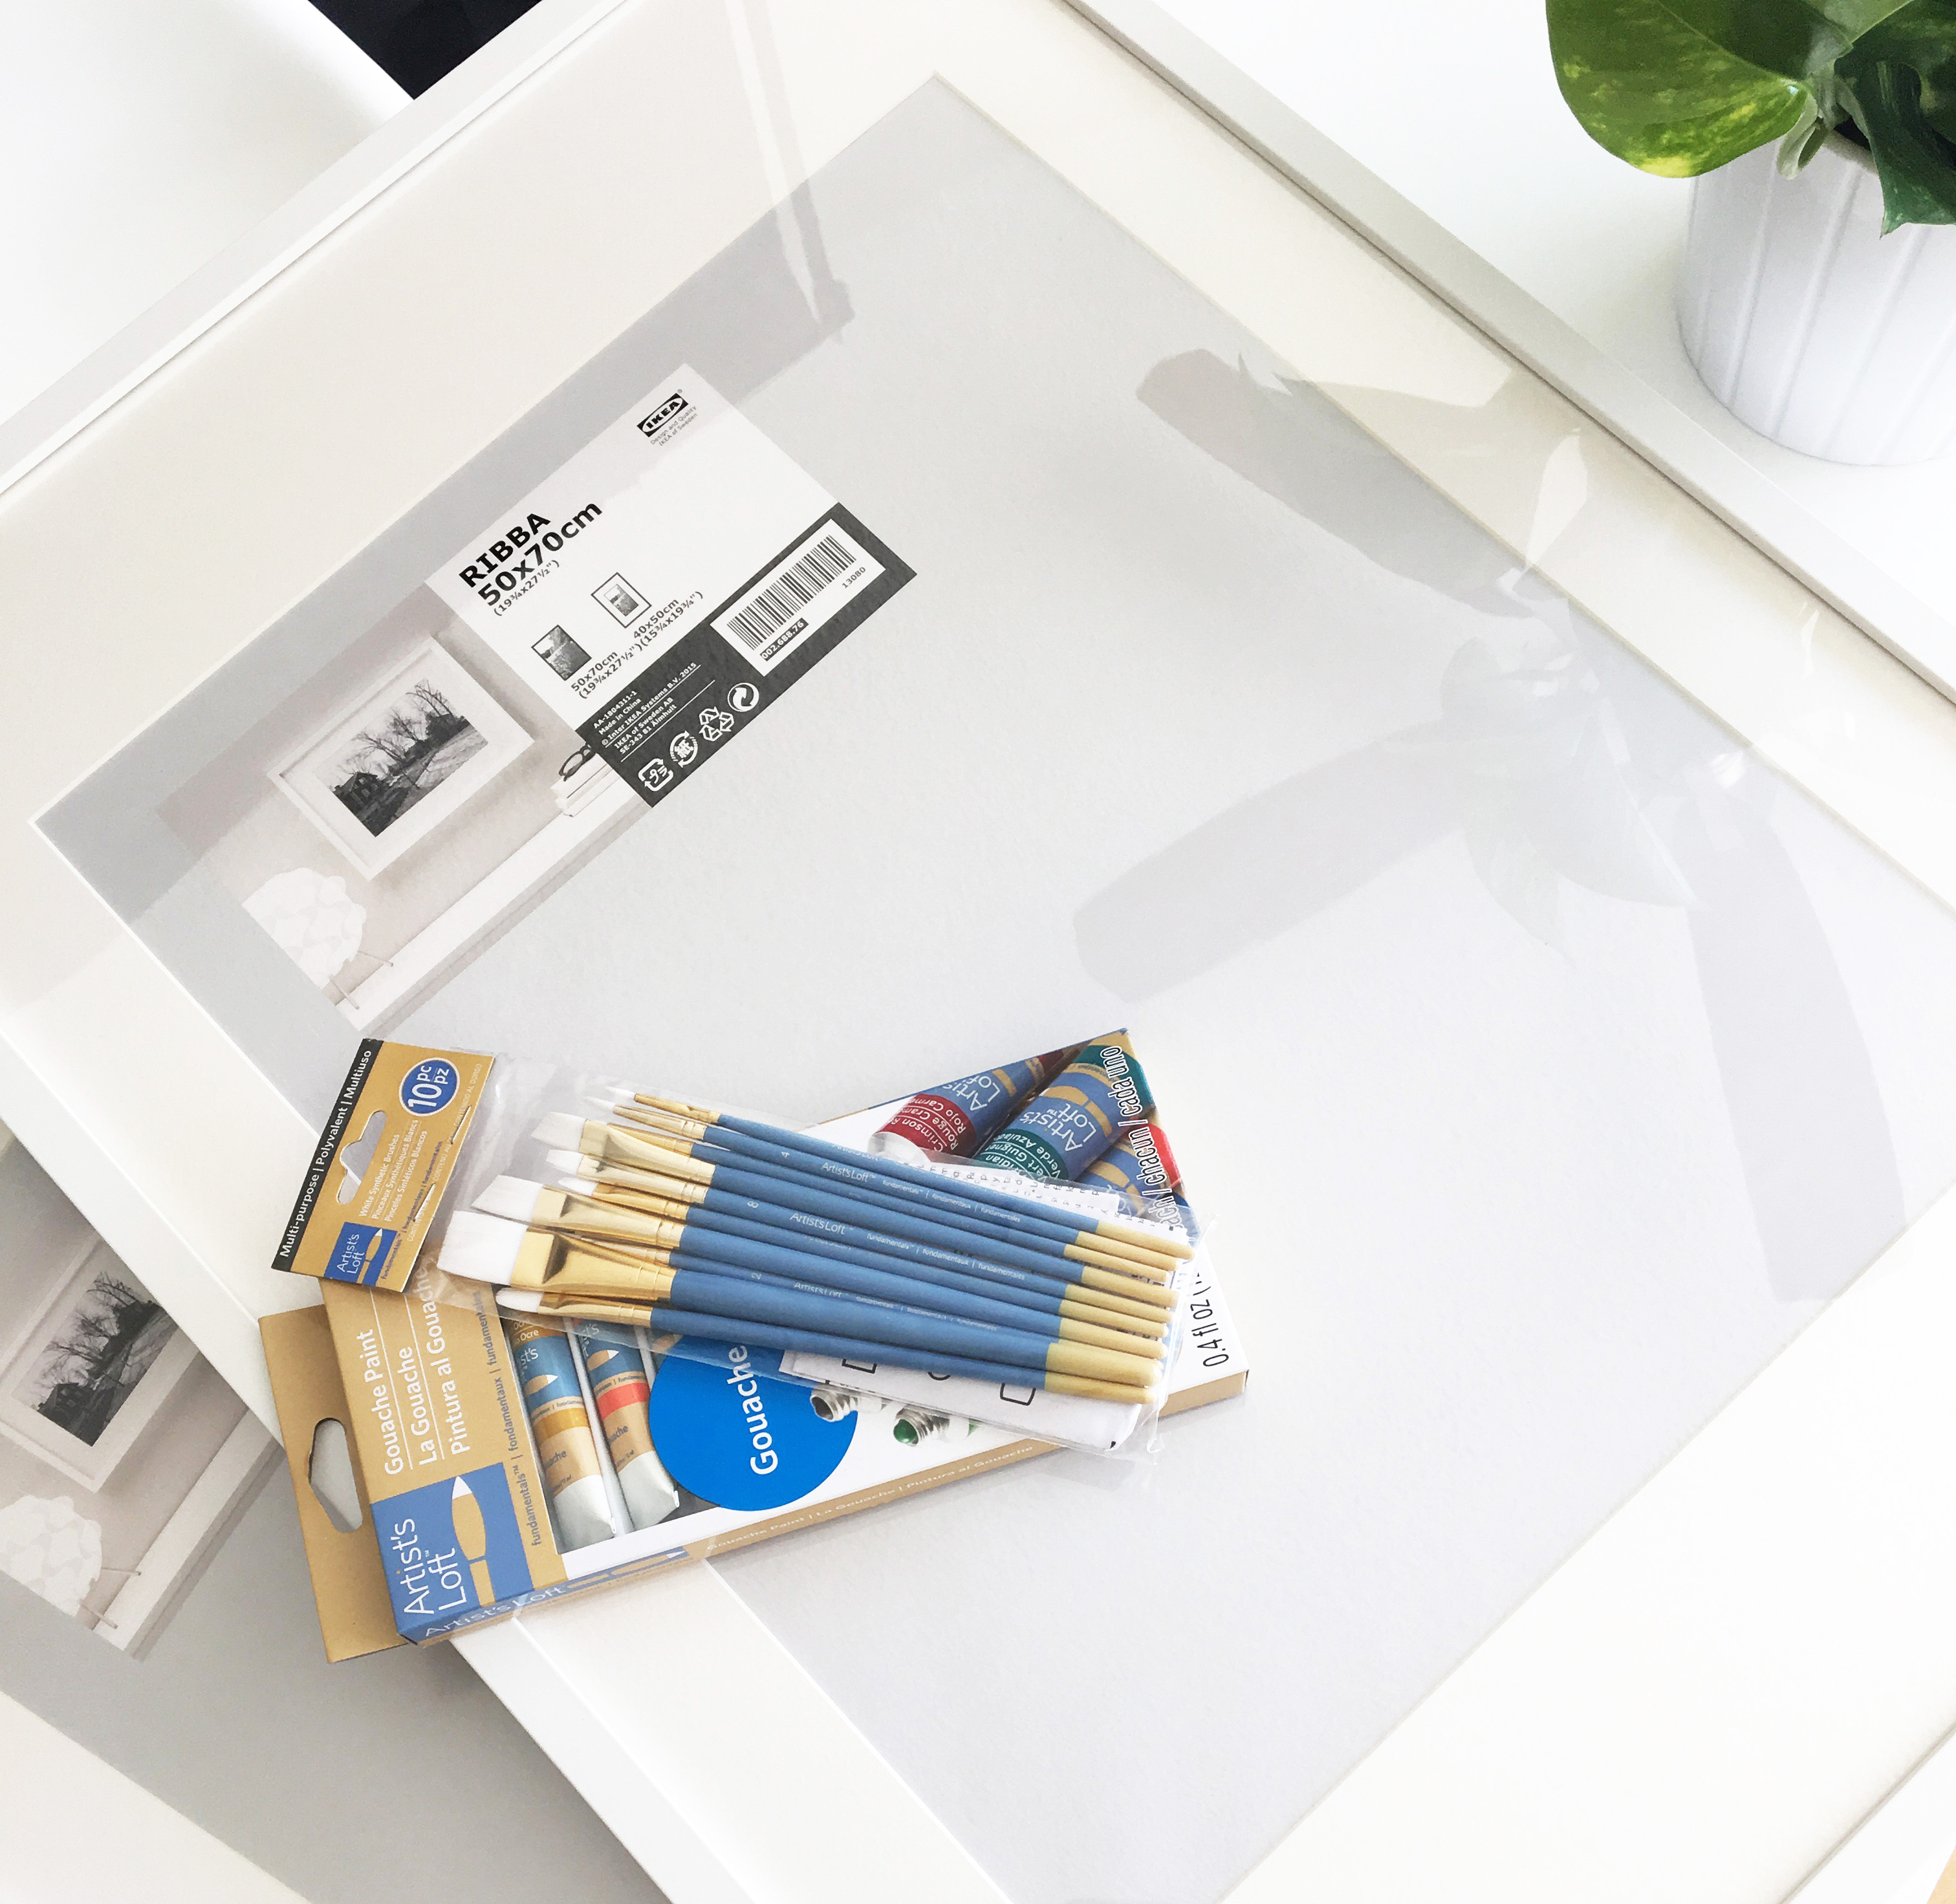
What you need:
- Medium sized picture frames from Ikea (I used Ribba 50x70cm frames)
- Paint of your choice (I used gouache but watercolor or acrylic would work too)
- Paint brushes
- Water
- Paper (water color paper works well or other heavy duty paper)
Step 1.
Pick about 3 base colors and 2 accent colors. I chose pink, mustard and dark blue as my base colors and peach, mint and black as my accent colors. You can create any color combination you want or check out Pinterest or Etsy for inspiration.
Step 2.
Start with the base colors and begin painting random shapes and blobs wherever your heart desires. Remember, it doesn’t have to be perfect so don’t take yourself too seriously and just have fun with it!
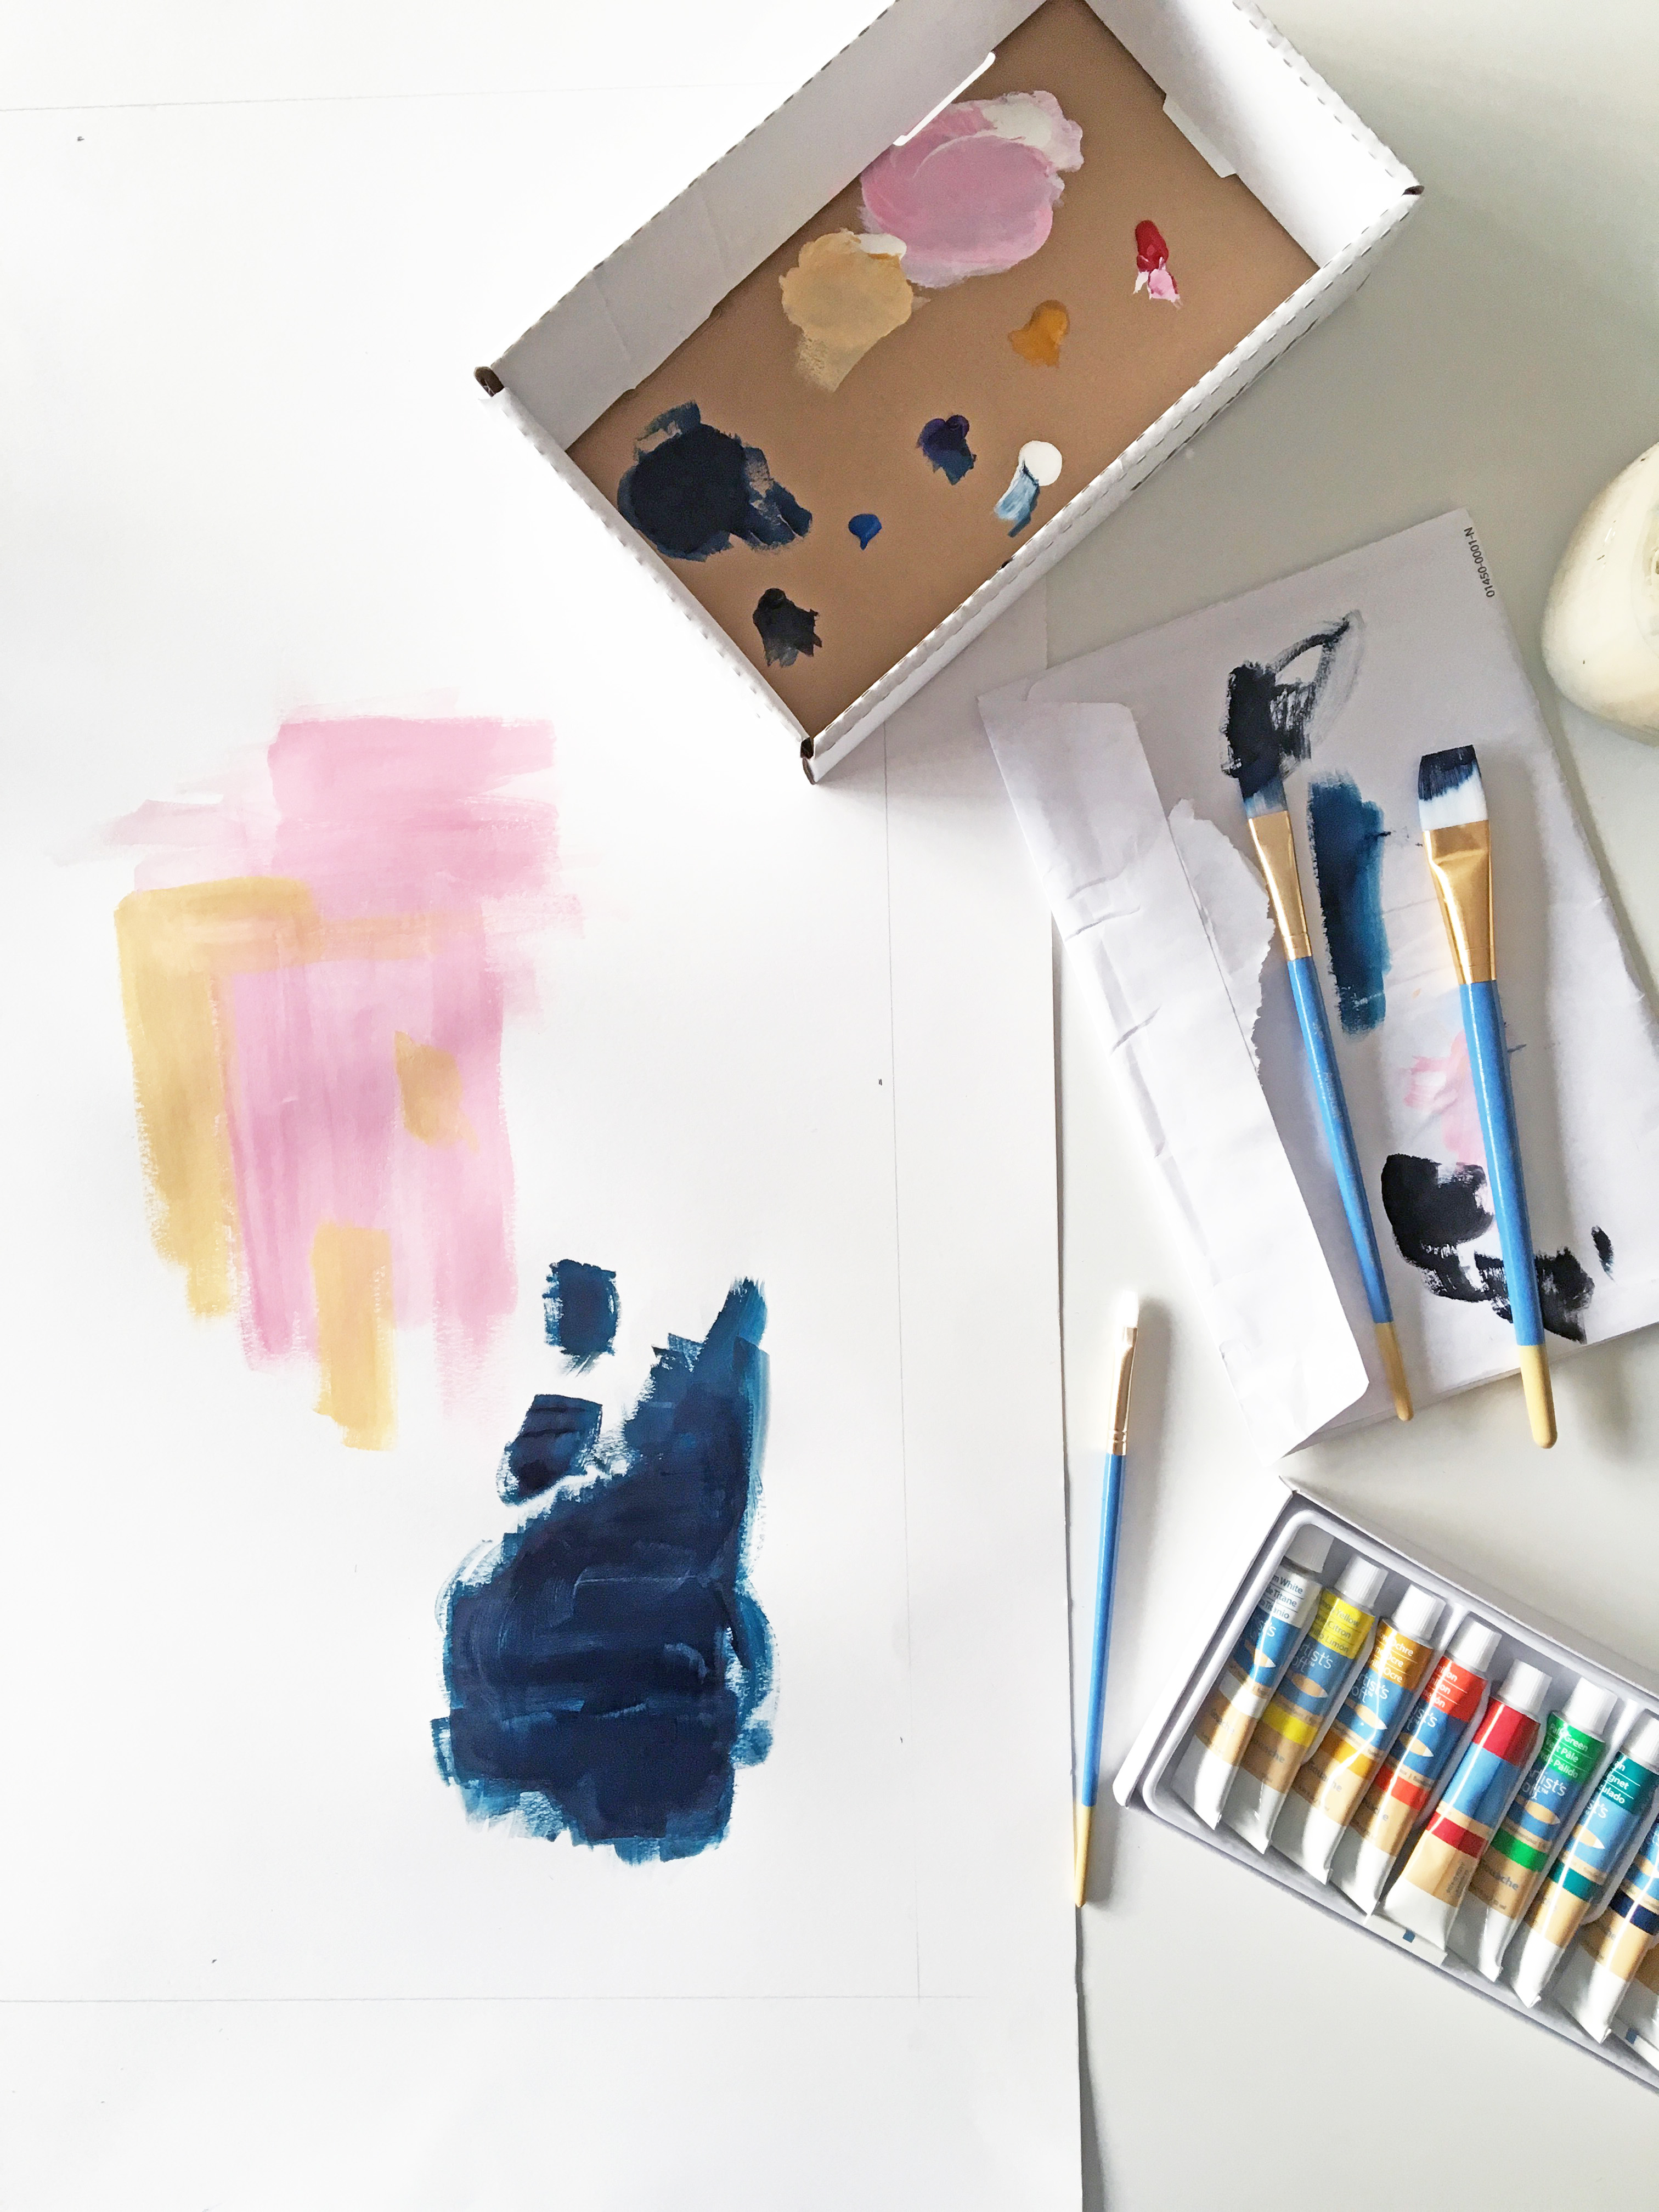
Step 3.
Add the accent colors using thinner brush strokes, dots or other small shapes on top of your larger shapes. A composition trick is to try to make the painting look balanced. If you have a lot of paint and heavy color on one side, weigh it down on the other side by adding a darker block of color or a series of small shapes that are closer together.
Step 4.
Once you’re happy with the picture and composition let it dry for a few hours, place it in the frame, hang it on the wall and of course, instagram that baby!
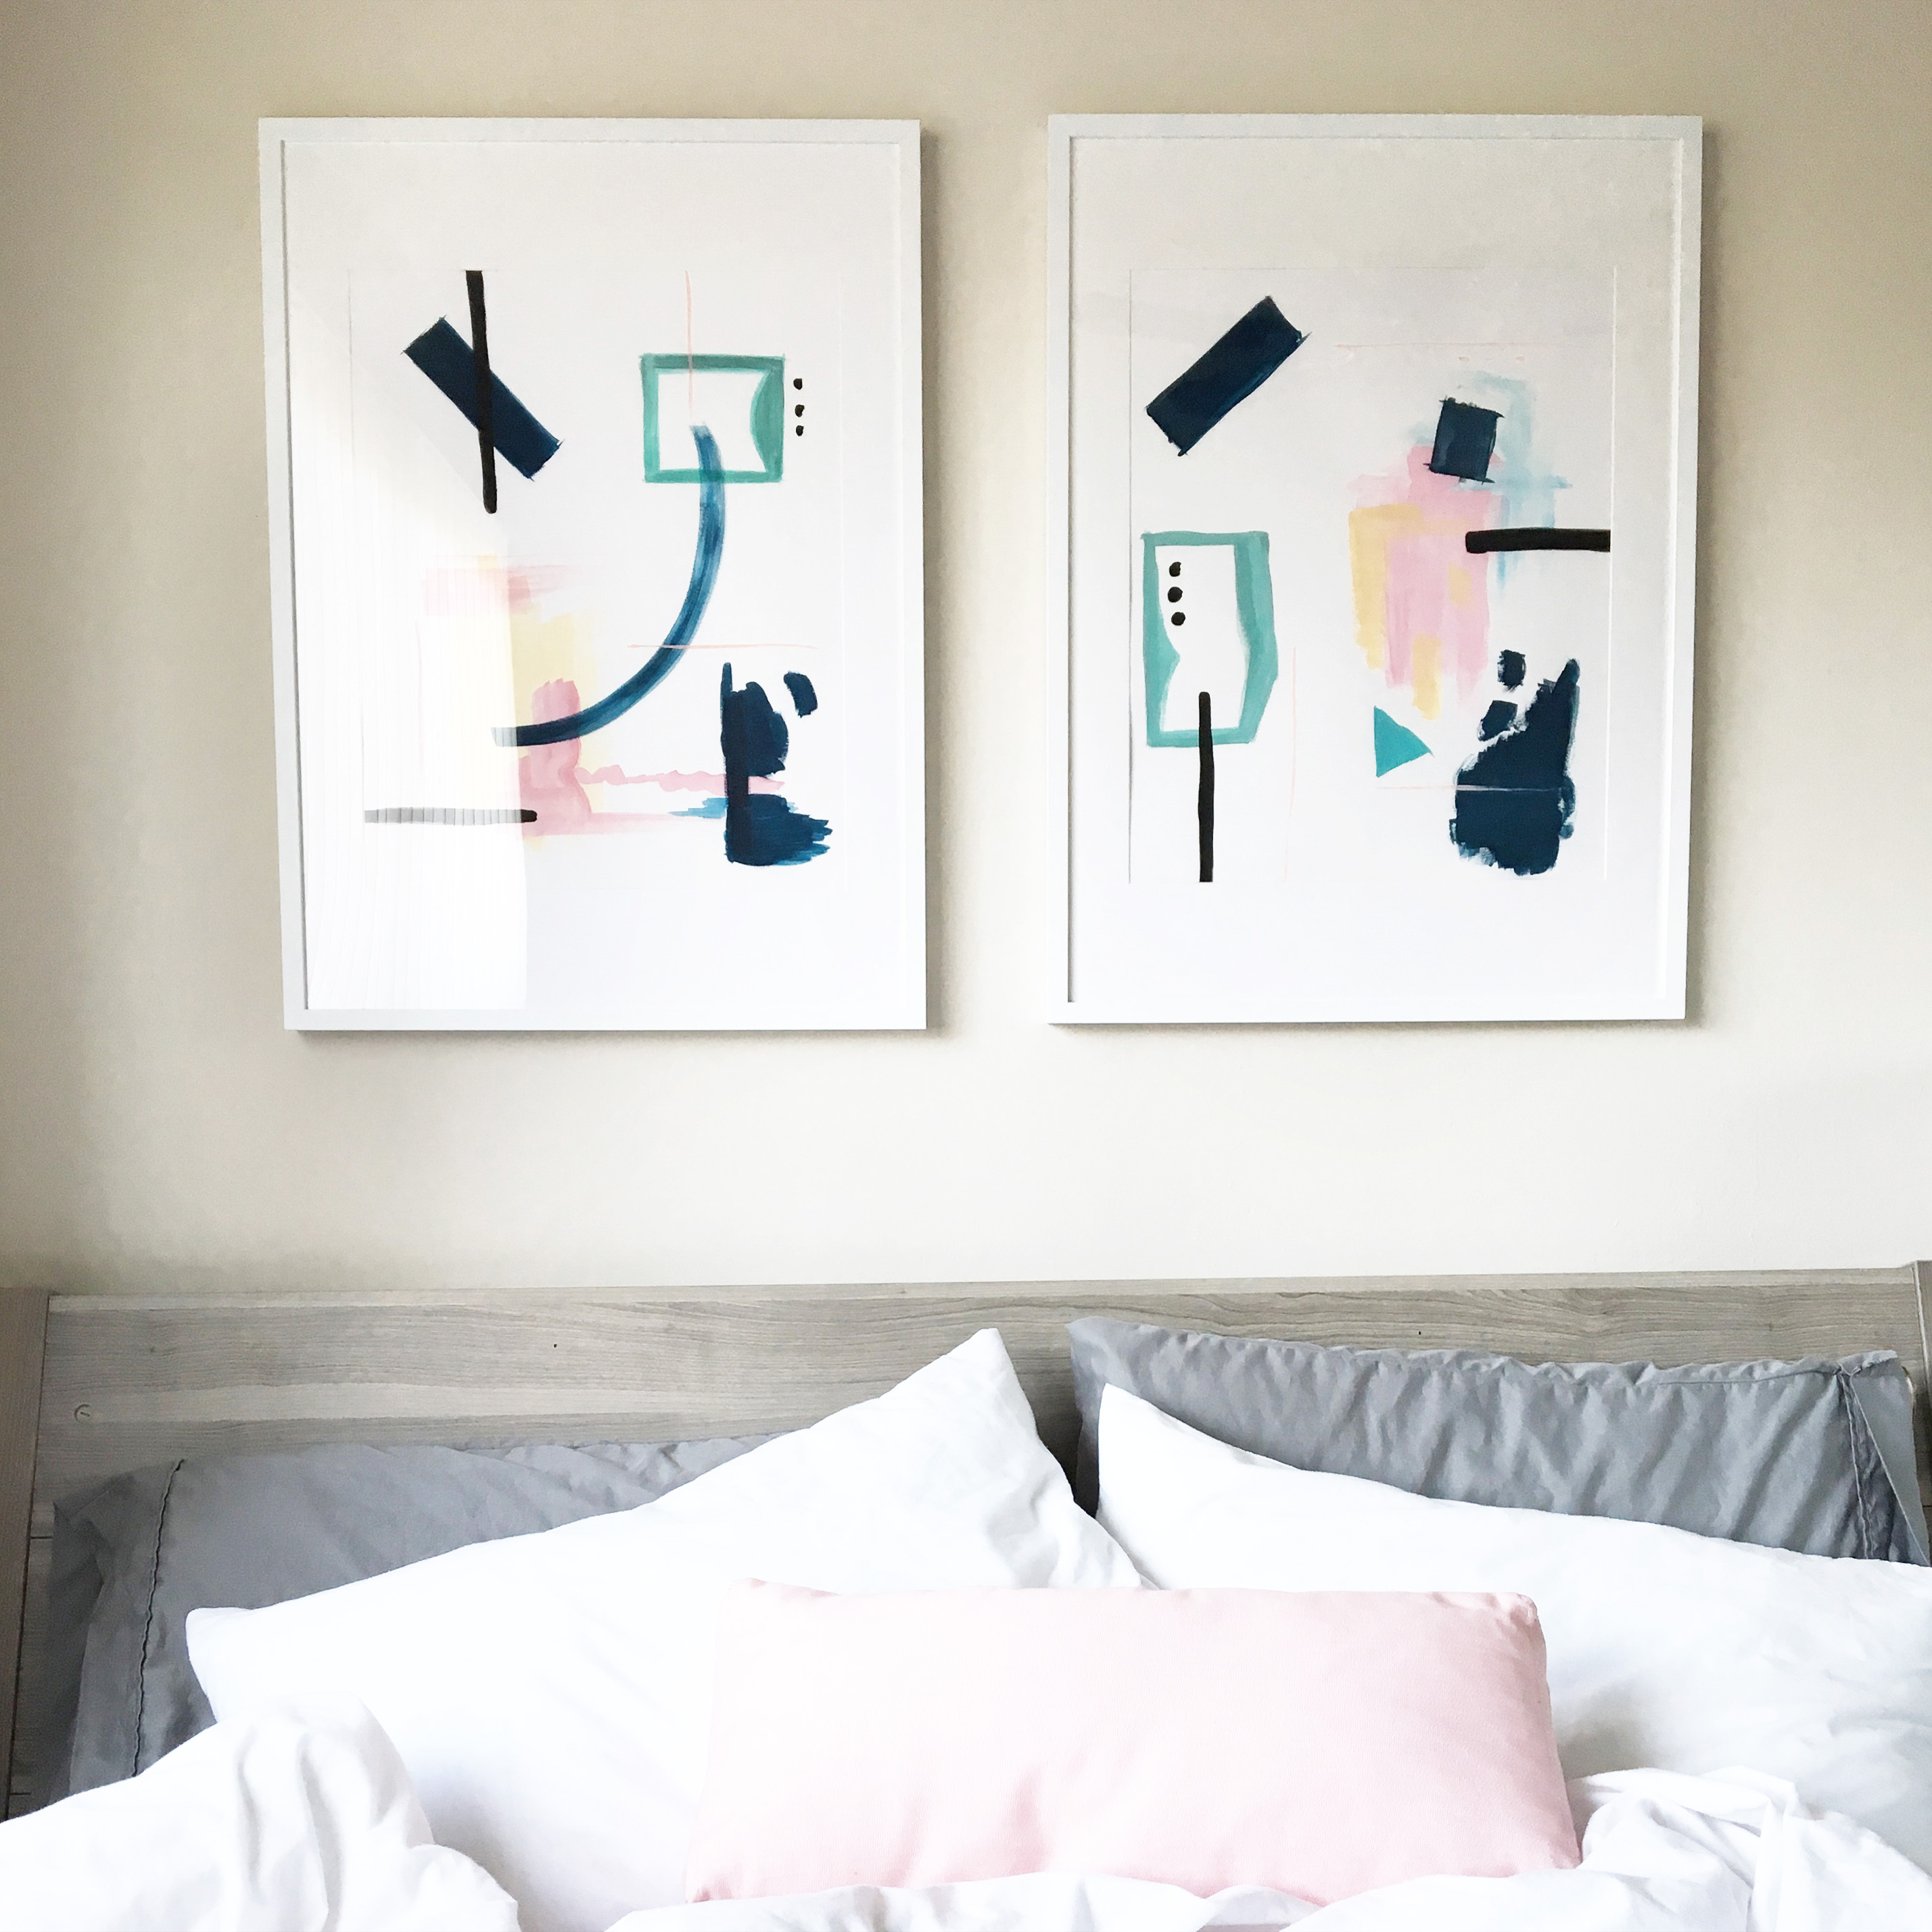
If you made your own DIY Wall Art I’d love to see! Tag me in instagram @sabrina_soto! xo